Total Pageviews

Sunday, June 9, 2013

Picture This: Tips For Creating a Gallery Wall!

We have all seen a gallery walls in a magazines and envied their symmetry or perhaps their intentional eclectic mix of frames and sizes that just seems to work so perfectly!  Here are some tips that will help demystify and help you to create that perfect curatorial look!

  1. Plan Your Arrangement!  Avoid making too many unnecessary nail holes in your wall by first tracing your framed photos or art on paper.  You can then you can tape these to the wall and help play around with your arrangement before you commit!
  2. Space Them Out!  Do you want a cluster of art to read as one piece?  Do you want them to form a line across the room?  Let your arrangement dictate spacing.  Make sure they aren't too crowded but also not too far or else they will look sparse.  
  3. Theme It!  You can organize your collection in a number of ways.  The first being content.  All your artwork or photos can pertain to a particular item or memory for example a vacation to Cape Cod.  You can also organize your wall by the color story of the actual work being framed for example all the art/photography's primary color is green.  For this theme, you don't want the frames to distract from the overall color read of the grouping.  Finally, you can unite a collection of seemingly random art/photos by framing them all in the same colored frames.  Another way is to pick a variety of fun colored frames that work with the art but also enhance the over all experience.
  4. Mix It Up!  Use a wide mix of frame shapes and sizes.  Also hang items vertically and horizontally. Kick up the grouping by adding artifacts among the framed work.  
  5. Center It (If You Want To)!  You can be traditional and start with the piece you want in the center of the grouping and work out.  That said, rules are meant to be broken!  You could have a collection wrap around a corner, using that corner as the center.  You also could start near the ceiling with a small picture and work down the wall increasing the size of the work creating a pyramid effect.  
  6. Scale It!  Keep your work withing a balanced range.  If you want to incorporate a larger piece make sure the wall is large enough and you include other pieces of a complimentary scale.
Gallery wall in Michael's Apartment.  Michael used content to unit this grouping: Cape Code & Provincetown!

Sunday, June 2, 2013

Experimenting With Garden Whimsy!


 Last year, I decided to experiment with ways I could make my garden look a little more whimsical.  It was really to distract people from the weeds I wasn't ready to pull.  I started by buying a piece of 1/4 inch plywood at my local hardware store.  Then I drew some funky designs and cut them out using my band saw.  This was pretty work intensive to say the least.  After they were cut out, I painted the designs with acrylic craft paint and when I was finished, I screwed them onto a piece of  2x1 furring.  Unfortunately, I didn't leave a piece of the support showing at the top so when I tried to hammer them into the ground it was very difficult not to wreck the art work I had just created.  I also used a poly clear coat to help them weather the elements. Needless to say, next year I got wiser!


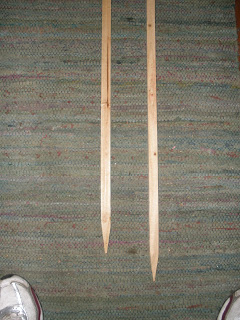
This year, I went to my local garden supply store and purchase pre-fabricated wooden stakes which come in various lengths.  I also visited my local arts and crafts store and picked up pre-cut plywood rounds to make my life easier and avoid the band saw.  (See both above)


Not having to use the band saw gave me a level of creative that I didn't experience with the previous incarnation.  It allowed me to add funky, geometric backgrounds and fanciful florals to my designs. 


 Notice that this time I left a "hammering" knob at the top of each so I could pound them into the ground easier and without ruining my artwork.  To achieve the crisp look, I outlined my work with a permanent marker such as a Sharpie.  Instead of screws to fasten the art to the posts I used small nails.  Goodbye drill!  To seal the artwork, this year I used a poly-spar (used for boats).  By making these improvements, it made the whole process faster and a lot more fun.  No more headaches!


Voila, the completed project!!!

- KATHLEEN