- Save small candies such as Smarties or Life Savers to decorate holiday gingerbread houses.
- Save hard candies such as Jolly Ranchers or Worthers Originals to infuse vodka or rum. Use 1 liter of vodka and a 1/2 cup of hard candy. Let it steep for a few weeks or until the candy dissolved. We haven't tested this idea but you could also try melting the candy with a little water in a saucepan and pouring the mixture into the vodka. WARNING: Melted sugar is extremely hot!
- Save Hershey's Kisses and Peanut Butter Cups to infuse in bourbon (or vodka as well). Let 2 1/2 oz of chocolate steep for 24 hours in the booze.
- Donate extra candy to a non-profit to enhance holiday dinner.
- Put extra candy treats in a food basket for the needy
- Use for prizes at a bazaar or holiday sale.
- Use the candy in special treat bag for the baby sitter or retirement home.
- Emeril Lagasse's Chocolate Biscuit Puffs
- Ingredients: 1 package of refrigerated buttermilk biscuits, 1 milk chocolate candy bar or 4 mini almond joys cut in half, 2 tsps cinnamon and sugar.
- flatten each biscuit into a 3 inch circle.
- Break the candy bar into pieces
- Place the pieces into the center of the dough circles and bring up the edges pinching to seal.
- Place on un-greased cookie sheet and sprinkle with the cinnamon sugar mixture.
- Bake at 450 degrees for 8-10 minutes or until golden brown.
Total Pageviews
Showing posts with label Joseph. Show all posts
Thursday, October 31, 2013
Solving The Too Much Candy Blues!
If you use Google, you will find dozens of sweet ideas to use up the excess booty from your little one's candy raid such as toppings on ice cream or cupcakes, chopped up into cookies, or swirled in cake batter! (Don't forget, candy freezes well and perfect for midnight snacks) We assembled a list of some not so typical uses for that left over candy.
Labels:
50 Shades of Grey,
Beer,
booty,
candy,
chocolate,
Halloween,
holiday,
Jesus,
Joseph,
mary,
non-profit,
rum,
sweets,
vodka
Wednesday, September 25, 2013
MEAL OF THE MONTH: SEPTEMBER
Roasted Cauliflower Soup With Bacon & Thyme
2 heads cauliflower
1/4 cup olive oil
1 quart chicken broth
1 pint half and half
2 tsp chopped fresh thyme
10 slices apple wood smoked bacon (or 3 slices country ham) minced & cooked
Pinh of white paper
kosher salt
Heat your oven to 400 degrees and line a rimmed baking sheet with parchment or foil lightly misted with cooking spray.
Cut out and discard the core of each head of cauliflower and then cut off the heads into large florets.
Drizzle florets with olive oil and toss to evenly coat. Next, sprinkle with 2 tablespoons of salt and toss again.
Arrange florets in a single layer on the prepared baking sheet and roast for 30 minutes. Flip the florets and roast for an additional 30 minutes until deeply caramelized and golden.
Transfer roasted florets to blender and add 2 cups of broth. Puree and then add half and half. Puree for an additional 3 minutes or until smooth. At this point the puree will be very thick. With the blender running, add the remaining both, thyme, and white pepper. Taste and adjust seasonings accordingly.
The soup can be transferred to a saucepan and gently heated. It can also be refrigerated and reheated easily. The flavor is best when allowed to rest overnight.
Gluten-Free Nutella Cheesecake Pots
(This recipe is in grams so use a kitchen scale)
Makes 6-8 ramekins.
Crust:
150g gluten-free graham crackers
50-60g butter, melted
Cheesecake:
390g cream cheese, room temperature
50g light brown sugar
90g Nutella
40g chocolate chips
In a food processor, pulse the butter and graham cracker until they form crumbs.
Scoop spoonfuls of the crust mixture into small ramekins or mugs. Press down lightly, but not as much as you would a normal cheesecake.
Clean food processor thoroughly.
Next, pulse together the cream cheese, sugar, and Nutella until smooth. Take a taste and add additional Nutella if you wish.
Add chocolate chips and pulse until ground into fine bits.
Divide the cheese cake between the ramekins. Cover and chill for six hours or until set.
Remove from fridge and let set on the counter for 20 minutes before serving.
(Thanks to The Gluten Free Scallywag for this epic recipe.)
2 heads cauliflower
1/4 cup olive oil
1 quart chicken broth
1 pint half and half
2 tsp chopped fresh thyme
10 slices apple wood smoked bacon (or 3 slices country ham) minced & cooked
Pinh of white paper
kosher salt
Heat your oven to 400 degrees and line a rimmed baking sheet with parchment or foil lightly misted with cooking spray.
Cut out and discard the core of each head of cauliflower and then cut off the heads into large florets.
Drizzle florets with olive oil and toss to evenly coat. Next, sprinkle with 2 tablespoons of salt and toss again.
Arrange florets in a single layer on the prepared baking sheet and roast for 30 minutes. Flip the florets and roast for an additional 30 minutes until deeply caramelized and golden.
Transfer roasted florets to blender and add 2 cups of broth. Puree and then add half and half. Puree for an additional 3 minutes or until smooth. At this point the puree will be very thick. With the blender running, add the remaining both, thyme, and white pepper. Taste and adjust seasonings accordingly.
The soup can be transferred to a saucepan and gently heated. It can also be refrigerated and reheated easily. The flavor is best when allowed to rest overnight.
Gluten-Free Nutella Cheesecake Pots
(This recipe is in grams so use a kitchen scale)
Makes 6-8 ramekins.
Crust:
150g gluten-free graham crackers
50-60g butter, melted
Cheesecake:
390g cream cheese, room temperature
50g light brown sugar
90g Nutella
40g chocolate chips
In a food processor, pulse the butter and graham cracker until they form crumbs.
Scoop spoonfuls of the crust mixture into small ramekins or mugs. Press down lightly, but not as much as you would a normal cheesecake.
Clean food processor thoroughly.
Next, pulse together the cream cheese, sugar, and Nutella until smooth. Take a taste and add additional Nutella if you wish.
Add chocolate chips and pulse until ground into fine bits.
Divide the cheese cake between the ramekins. Cover and chill for six hours or until set.
Remove from fridge and let set on the counter for 20 minutes before serving.
(Thanks to The Gluten Free Scallywag for this epic recipe.)
![]() |
| It's that good! |
Monday, September 16, 2013
Roll The Tape, Timmy!
Here are a few EXCITING new uses for tape!!!
1) Electrical tape comes in a variety of colors these days, so when your are having guests over use your collection to tag drink cups to avoid awkward mix ups!
2) When you tighten your belt does the tail hang low? If it does, try some double sided "fashion" tape to keep it in place.
3) Protect your plaster! When hanging your next family photo or piece of artwork place a piece of scotch tape on the spot where the nail will be driven. It will prevent cracking and chipping.
4) Did you eat your Triscuits over your keyboard and now it is full of crumbs and stuff? Try sliding a long piece of transparent tape between the rows of keys. The sticky side will pick up dust and food particles in a jiff!
5) Does your luggage look like everyone else's at the airport? Help make baggage claim easier by adding a unique strip of colorful or patterned duct tape to your bags to help them stick out!
6) Next time you have spare screws left over from assembling your latest IKEA find, try storing them between layers of clear packing tape. You can even label your packets to make finding them in the future easier!
Bonus Random Tip: Connie was trying to pour the glitter from our glitter station back into its respective containers. It took her a week to organize the particles into color groups and she didn't want to mess up her work. The office was fresh out of funnels that day so Wendell (always willing to be Connie's mindless slave) quickly folded over and rolled a piece of aluminum foil from our foil station into a gleaming, silver funnel! Connie was thrilled and the next three months of glitter sorting was avoided. Thank you Wendell! We know what a snit Connie gets in when she is assigned glitter sorting duties.
1) Electrical tape comes in a variety of colors these days, so when your are having guests over use your collection to tag drink cups to avoid awkward mix ups!
2) When you tighten your belt does the tail hang low? If it does, try some double sided "fashion" tape to keep it in place.
3) Protect your plaster! When hanging your next family photo or piece of artwork place a piece of scotch tape on the spot where the nail will be driven. It will prevent cracking and chipping.
4) Did you eat your Triscuits over your keyboard and now it is full of crumbs and stuff? Try sliding a long piece of transparent tape between the rows of keys. The sticky side will pick up dust and food particles in a jiff!
5) Does your luggage look like everyone else's at the airport? Help make baggage claim easier by adding a unique strip of colorful or patterned duct tape to your bags to help them stick out!
6) Next time you have spare screws left over from assembling your latest IKEA find, try storing them between layers of clear packing tape. You can even label your packets to make finding them in the future easier!
Bonus Random Tip: Connie was trying to pour the glitter from our glitter station back into its respective containers. It took her a week to organize the particles into color groups and she didn't want to mess up her work. The office was fresh out of funnels that day so Wendell (always willing to be Connie's mindless slave) quickly folded over and rolled a piece of aluminum foil from our foil station into a gleaming, silver funnel! Connie was thrilled and the next three months of glitter sorting was avoided. Thank you Wendell! We know what a snit Connie gets in when she is assigned glitter sorting duties.
Wednesday, November 21, 2012
::LAST MINUTE THANKSGIVING TIPS::
Hello Loyal Readers!
We've missed you over the last couple of weeks! We have been super busy at the lab with the holidays approaching. Look for some great December content coming soon! Below we have included some super handy "last minute" tips from some of our favorite sources! May you all have a safe and joyful holiday!
BURLINGTON FREE PRESS
http://www.burlingtonfreepress.com/article/20121121/LIVING06/311210008/Vermonters-offer-last-minute-tips-recipes-those-cooking-Thanksgiving?odyssey=mod%7Cnewswell%7Ctext%7CFRONTPAGE%7Cp&nclick_check=1
REAL SIMPLE MAGAZINE:
http://www.realsimple.com/holidays-entertaining/holidays/thanksgiving/how-to-fix-10-common-thanksgiving-problems-10000001549093/index.html?xid=rs-weeklynews-11-21-2012&nlwt
Cheers!
The CELEBRATE Staff!!!
We've missed you over the last couple of weeks! We have been super busy at the lab with the holidays approaching. Look for some great December content coming soon! Below we have included some super handy "last minute" tips from some of our favorite sources! May you all have a safe and joyful holiday!
BURLINGTON FREE PRESS
http://www.burlingtonfreepress.com/article/20121121/LIVING06/311210008/Vermonters-offer-last-minute-tips-recipes-those-cooking-Thanksgiving?odyssey=mod%7Cnewswell%7Ctext%7CFRONTPAGE%7Cp&nclick_check=1
REAL SIMPLE MAGAZINE:
http://www.realsimple.com/holidays-entertaining/holidays/thanksgiving/how-to-fix-10-common-thanksgiving-problems-10000001549093/index.html?xid=rs-weeklynews-11-21-2012&nlwt
Cheers!
The CELEBRATE Staff!!!
Labels:
10 inches,
50 Shades of Grey,
6 pack,
alcohol,
American Soldiers,
apple pie,
Beer,
black friday,
cashmere,
celebrate,
co-mingling,
drag queen,
holiday,
Jarlsberg,
Jesus,
Joseph,
lab,
mary,
sexy,
Thanksgiving
Wednesday, September 26, 2012
MEAL OF THE MONTH: SEPTEMBER
Chicken Cabbage Salad
1 head of cabbage shredded (Kathleen likes it chopped)
3 or 4 green onions (scallions), chopped
1/4 cup sugar
1/2 cup oil (vegetable or canola oil is best)
3 tbsp apple cider vinegar
1 pack of chicken flavored ramen noodles
Cooked Chicken (Kathleen uses 2 breasts cut into small pieces)
1/2 cup slivered almonds
2 tbsp sesame seeds
1-2 cups green grapes, whole
Mix the the cut cabbage and green onions together and chill.
To prepare the dressing, mix the sugar, oil, vinegar, and the season pack from the ramen noodles together. Shake well.
At serving time, crush the dry ramen noodles and add to bowl of cabbage. Add chicken chunks, grapes, almonds, sesame seeds, and dressing. Toss to incorporate.
This salad is very hearty and holds up well for leftovers!
FROM THIS!
TO THIS!
Labels:
almonds,
Cabbage,
chicken,
chopsticks,
grapes,
green onion,
Jesus,
Joseph,
mary,
Meal of The Month,
noodles,
oil,
ramen,
scallion,
sesame
Thursday, September 6, 2012
Sizzling Sisal DIY Decor Projects!!
Hello Faithful Followers & Web Wanderers Alike!
While most of the free world was spending its Labor Day Weekend eating delicious picnic and BBQ foods (like Kathleen) Michael's was holed up away from the world working on some creative projects like a DIY UnaBomber (sans Sunglasses and Hoodie)! Here are a few of the fruits of his labor using one of his favorite embellishment, sisal rope!
The Woven Sisal Accented Wire Basket
The former wire vegetable basket that Michael purchased from Pier 1 several years ago had found its home storing coffee table books in Michael's apartment since he doesn't make enough money to afford a coffee table (or vegetables for that matter). The basket had become tired and boring, not adding anything to the room and he wanted to breath new life into it for little money. In comes the always dependable, sisal rope! Michael purchased his at a "junk" store for about $1.50 for approximately 20 feet of rope. Harking back to his plastic embroidery mesh days, Michael wove the rope in a diagonal pattern through the openings of the wire basket. Before determining this pattern, he tried a few other approaches such as weaving the rope in and out of the openings. None of them had the same visual impact as the "cross stitch" method! Michael decided to complete the look at three full rows, securing the ends with standard straight pins. You could be industrious and do more rows but for this project the contrast between the wire and the rope seemed perfect at three rows.
It's A Wrap: Over-Sized Decorative Vase
The four foot tall orange glass vase that had become a staple in his apartment decor had begun to bore Michael and he wanted to (like the basket above) spruce it up with little to no capital investment. Once again, enter the ever handy sisal rope! He simply took a length of the rope approximately 6-8 feet long and wrapped it tightly around the neck of the vase securing it in place with several straight pins in the top and bottom coils. This allows him the flexibly to remove the rope if he decides to change up his decor in the future!
These are just a few of the ideas Michael thought up but the possibilities are limitless! We would love to see your DIY decor project using sisal rope (or anything for that matter)!!! Send them to: currenteventplanning@gmail.com You might be featured in your very own post!
While most of the free world was spending its Labor Day Weekend eating delicious picnic and BBQ foods (like Kathleen) Michael's was holed up away from the world working on some creative projects like a DIY UnaBomber (sans Sunglasses and Hoodie)! Here are a few of the fruits of his labor using one of his favorite embellishment, sisal rope!
The Woven Sisal Accented Wire Basket
The former wire vegetable basket that Michael purchased from Pier 1 several years ago had found its home storing coffee table books in Michael's apartment since he doesn't make enough money to afford a coffee table (or vegetables for that matter). The basket had become tired and boring, not adding anything to the room and he wanted to breath new life into it for little money. In comes the always dependable, sisal rope! Michael purchased his at a "junk" store for about $1.50 for approximately 20 feet of rope. Harking back to his plastic embroidery mesh days, Michael wove the rope in a diagonal pattern through the openings of the wire basket. Before determining this pattern, he tried a few other approaches such as weaving the rope in and out of the openings. None of them had the same visual impact as the "cross stitch" method! Michael decided to complete the look at three full rows, securing the ends with standard straight pins. You could be industrious and do more rows but for this project the contrast between the wire and the rope seemed perfect at three rows.
It's A Wrap: Over-Sized Decorative Vase
The four foot tall orange glass vase that had become a staple in his apartment decor had begun to bore Michael and he wanted to (like the basket above) spruce it up with little to no capital investment. Once again, enter the ever handy sisal rope! He simply took a length of the rope approximately 6-8 feet long and wrapped it tightly around the neck of the vase securing it in place with several straight pins in the top and bottom coils. This allows him the flexibly to remove the rope if he decides to change up his decor in the future!
These are just a few of the ideas Michael thought up but the possibilities are limitless! We would love to see your DIY decor project using sisal rope (or anything for that matter)!!! Send them to: currenteventplanning@gmail.com You might be featured in your very own post!
Labels:
basket,
Buddha,
cheap,
cross stitch,
decor,
DIY,
embroidery,
IKEA,
Jesus,
Joseph,
Kathleen,
mary,
Michael,
Pier 1,
rope,
sisal,
straight pin,
vase,
wire
Wednesday, August 29, 2012
::DIY TRIVET THAT WON'T LEAVE A DIVOT IN YOUR WALLET::
![]() |
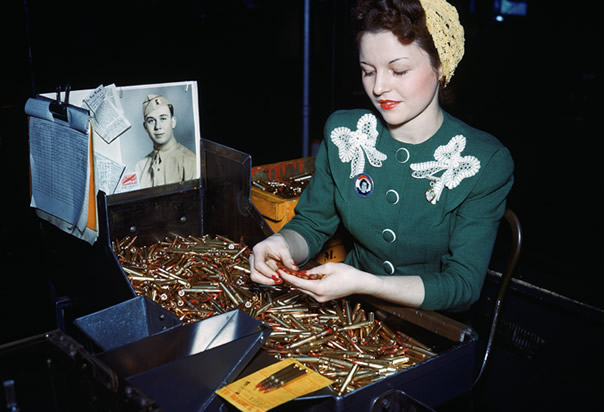
| Connie as a young woman inspecting bullets during WWII The Big One! |
What You Need:
- A piece of 1"x1" square dowel or trim
- dowels approximately the thickness of a pencil or hot dog/marshmallow stick summer clearance end caps (You can find these at discount and dollar stores where you can purchase a bag of 10-15 for $1.00 or less)
- Power drill (cordless or corded, it doesn't matter) with a drill bit the size of your dowels/sticks
- Wood glue
- Ruler
- Cut your 1"x1" to your desired length (cut two). Ours were approximately 10 inches.
- Place the two pieces of 1"x1" side by side. Using your ruler, measure in and mark 1 inch from each end. Next, divide the remaining space equally (ours were about 1.5 inches apart after we measure in the initial 1 inch). Of course, if you want lager pieces or more dowels there is plenty of customization on this project.
- Using your drill, drill holes partially through the 1"x" square dowel at the marks you made. (Before using your drill, measure approximately 1/2 inch up the drill bit and wrap a piece of masking tape around it. This will serve as your depth guide to ensure all your holes are the same.)
- Take your dowels and cut them into equal lengths depending on how wide you want your trivet to be.
- Next, fill each hole on one of the 1"x1" pieces with a dollop of wood glue.
- Press each of the dowels into the holes.
- Repeat Step 5 on the second 1"x1" section.
- Secure the completed trivet with a large rubber band or twine to brace the pieces while it dries.
You can customize your trivet by staining (NOT painting) the dowels any number of shades before assembly. You can use traditional stain, food coloring, colored inks, etc.
In spite of all these directions they are super simple to make and make great presents!
Wednesday, August 15, 2012
MEAL OF THE MONTH: AUGUST
EX- WIFE'S CHICKEN FRICASSEE
1 whole chicken or equivalent amount of boneless chicken
1 onion
2 stalks of celery
1/2 stick butter
3 generous tbsp flour
1/2 light cream
1/2 tsp lemon juice
salt and pepper to taste
Boil chicken gently with the chopped onion, celery, salt, and pepper for 1 hour. Remove chicken from broth and reserve. Once cool, debone if necessary and shred. In large skillet, melt the butter and sprinkle in the flour. Stir until smooth over a medium heat. Mix the cream and 1 2/3 cups of reserved chicken stock (water used to cook the bird) in a separate container. Sprinkle salt and pepper over the roux, stirring constantly. Slowly pour the cream/broth mixture into the roux continuing to stir. Add the shredding chicken back to the sauce, cover and simmer for 5-10 minutes until the mixture has thickened.
TIPS:
- Due to the mild taste of the dish, it tastes especially good over jasmine rice.
- Feel free to add mushrooms or asparagus. You could even try peas and carrots!
ENJOY!!!!
1 whole chicken or equivalent amount of boneless chicken
1 onion
2 stalks of celery
1/2 stick butter
3 generous tbsp flour
1/2 light cream
1/2 tsp lemon juice
salt and pepper to taste
Boil chicken gently with the chopped onion, celery, salt, and pepper for 1 hour. Remove chicken from broth and reserve. Once cool, debone if necessary and shred. In large skillet, melt the butter and sprinkle in the flour. Stir until smooth over a medium heat. Mix the cream and 1 2/3 cups of reserved chicken stock (water used to cook the bird) in a separate container. Sprinkle salt and pepper over the roux, stirring constantly. Slowly pour the cream/broth mixture into the roux continuing to stir. Add the shredding chicken back to the sauce, cover and simmer for 5-10 minutes until the mixture has thickened.
TIPS:
- Due to the mild taste of the dish, it tastes especially good over jasmine rice.
- Feel free to add mushrooms or asparagus. You could even try peas and carrots!
ENJOY!!!!
Labels:
August,
butter,
celery,
chicken,
Chicken Fricasse,
flour,
Jesus,
Joseph,
lemon,
mary,
Meal of The Month,
onion
Wednesday, August 8, 2012
::PLUCKED FROM PINTEREST::
This week the team at CELEBRATE did some overtime cruising one of our favorite websites, Pinterest! Here is the cream of the crop:
1.) Find a dark colored t-shirt and a cool icon (for example, the solid silhouette of a moose). Affix a cut-out of the icon onto the shirt and mist/spray with bleach. This will create a fabulous negative space print of the cut-out! FYI, black shirts bleach orange so choose your color wisely.
2.) Put marshmallows in your brown sugar to keep it soft!
3.) Don't throw away the plastic sprinkle top to the Parmesan cheese or the round cardboard top to a box of salt! Both fit perfectly on mason jars! The possibilities are endless! We like using them for powdered sugar, glitter, or even rock salt!
4.) Use your waffle iron for cooking more than just waffles! You can make wonderful, crispy hash browns, small cookies, or even cinnamon buns!
5.) Use a glue tip/cap on a acrylic, craft, paint bottle to make painting lines a breeze!
6.) Maximize your closet space (and give yourself an excuse to go shopping) by using soda tabs to double hang items. Slip the first hole of the table over the wire neck of the first hanger and than you can hang a second hanger from the second hole.
6.) Instead of dribbling your apples with lemon juice to prevent browning, try spraying them with orange juice in a spray bottle! This will prevent the browning and have a less harsh bite than the lemon juice!
7.) Use chalk to pre-treat oil stains on clothing before washing. The chalk helps to dry the oil.
Labels:
bleach,
blue,
brown sugar,
chalk,
grease,
hash brown,
Jesus,
Joseph,
mary,
mashmallow,
OJ,
Pinterest,
salt,
waffle
Wednesday, July 25, 2012
::Outdoor Party Perfection::
Here are some wonderful tips to help you CELEBRATE the summer in style and comfort! Thanks to our friends at Real Simple Magazine for these ideas!
- When you send out your invites, make sure to tell your guests when you will be serving food. For example, "Food will be served from 6:00pm-8:00pm". This way the food can be fresh for all guests attending with the intention to eat. You will only have to start the grill once!
- Have enough seats! Bring out chairs from the house or spread out blankets or quilts for people to picnic on.
- Lighting! Strings of lights, paper lanterns, or candles in mason jars always warm up the feeling of a party. If you need to run extension cords across the yard, clip wire coat hangers into 3-4 inch sections and bend them into "U" shaped pegs and drive them into the lawn over the wires to prevent tripping.
- Mosquitoes Menace! A week before the party, empty all sources of standing water (kiddie pools, old tires, gutters, etc). Set up fans because mosquitoes don't fair well in the wind. Set out a bowl of insect repellent wipes for guest to use if need be.
- Music! Don't blast the music because it reduces conversation. Place your speakers high above head level and turn the speakers towards the side of the house to help take advantage of better acoustics.
- Kids! If there are children at the party make sure they are entertained. Have bottles of bubbles; turn on the sprinkler; hand out disposable cameras, etc.
- Hot? If the temperature is more than you can handle have a basket of hand fans available and have wash clothes (from the dollar store) soaked in ice water from people to place of their necks and wrists!
- Use disposable plates and cups to make things easier! Separate your drink, food, and dessert stations. This helps to prevent traffic jams and increase conversation!
- Keep the food simple and cold (if it needs to be)! Create ice bowls by filling a larger bowl with water (which you can color or if you'd like). Next float a smaller empty bowl within the larger bowl weighting it down so it sinks slightly. Place this into the freezer and freeze until solid (1-2 days). Once frozen, pop the smaller bowl out of the now frozen form. Fill it with your favorite mayonnaise/yogurt based salads and return to the ice bowl! This will keep everything fresh, cold, and safe!
- Have some labels and a permanent marker on hand for guests to label their drinks to avoid confusion! You could even print out labels if you have a prearranged guest list in mind!
- Windy? Use fruit such plums, oranges, etc to hold down plates on a windy day! Tie or clip down your tablecloth to avoid fly aways.
Labels:
candles,
chair,
cold,
food,
gutters,
hot,
ice,
Jesus,
Joseph,
labels,
mary,
mason jars,
mosquitoes,
music,
paper plates,
Real Simple,
summer,
windy
Wednesday, July 18, 2012
::Small Suitcase Savvy::
This is the time of year when you are most likely to hop onto a plane and set off into the wild blue yonder! Here is a helpful list of essential items not to forget.
PERSONAL ITEM CHECK LIST:
- Contact lenses and/or (sun)glasses. Extra pair if you have them. Contact solution too.
- Batteries for small electronics or appropriate chargers (cellphone, camera, etc)
- Headphones for watching movies in-flight (save yourself some cash!)
- iPod and iPod charger
- Camera (if you want something more than your iPhone for pictures)
- Kindle, Nook, or iPad (or other eReader)
- Alarm Clock (for those of you in the stone age or who are tech savvy enough to use your cellphone)
- Antibacterial wipes or gel
- Body lotion (including aloe "after sun" lotion)
- Sunscreen
- comb or brush
- deodorant
- first aid kit: antacid, gas relief medication, anti-diarrheal, anti-histamine, band-aids, triple antibiotic ointment, motion sickness medicine, mild laxative, pain-reliever, thermometer.
- dental floss
- insect repellent
- lip balm
- makeup
- personal-hygiene items
- RXs
- Razor
- Shampoo, conditioner, and body wash if you have a special kind (pack any quantity more than the allowed amount in your checked bags)
- shave gel and razor
- toothpaste and toothbrush
- Addresses of friends or family. This can be done on your cellphone or on paper. If you are REALLY good, print the addresses onto labels which you can then stick onto postcards!
- Healthy Snacks (Michael suggests raw almonds, Kathleen suggests dried apricots)
- Cash, debit cards, travelers checks, etc
- direction or GPS unit or smartphone with a GPS app.
- photo of luggage contents in case of loss. A list of valuables.
- Print-outs of reservations.
- Plastic bags for storing small liquid containers
Here are a few suggestion on how to pack your suitcase better than a Tokyo apartment!
- Shoes- Stick to the basics. Pack a pair or two in a shade which can work with the most outfits. Let your destination dictate your footwear. This might reduce your shoes to sandals and sneaker or to heels and flats. The most important thing to know is that shoes take up a lot of space, so choose wisely and wear the biggest pair on your trip.
- Experts suggest keeping your color pallet neutral so it's easy to make several outfits out of a few pieces. For example, pack an entirely white wardrobe and bring in color with your accessories. Accessories are smaller to pack and can be worth their weight in style! You might consider a two color max for you clothing to help maximize your options!
- WARNING: This next tip is not for the fashion faint of heart. Try to pack 1 pair of pants, 1 skirt, 3 tops. Mix and match! This tip might work better for a business trip than for a week in Ibiza!
- Here is a great tip from a faithful reader, Sue in New Hampshire. Check your local discount store for zip lock, space-saver "packing" bags. These bags have a one way vent so that when you roll your garments, the excess air escapes leaving the bag flat and thin taking up less space in your luggage. Try packing each bag with an outfit for each day of your trip!
Wednesday, July 4, 2012
MEAL OF THE MONTH FOR JULY
Japanese Pork Cutlets
1 to 1 1/2 coarse bread crumbs such as panko
1 to 1 1/2 lbs pork chops or pork steak, 1/2 inch thick\
1 egg
1 tbsp water
2 tbsp all purpose flour
2 cups finely shredded cabbage
1/2 shredded carrots
salad oil
salt and pepper to taste
Tonkatsu Sauce (See recipe below)
Tonkatsu Sauce: Stir together 1/2 cup ketchup and 2 tablespoon each of Worcestershire sauce and soy sauce.
Set aside your bread crumbs and Tonkatsu Sauce.
Trim and discard fat and bones from pork. Place meat between sheets of wax paper and pound with a mallet until the pork is a quarter inch thick.
Lightly beat egg with the water. Next spread the bread crumbs on a piece of wax paper or cookie sheet. Sprinkle each cutlet with salt and pepper to taste. Dust each piece of meat with flour, shaking off any excess. Dip cutlets into egg and press into crumbs to coat thickly all over. Set aside for 10 minutes.
Using a wok or a covered saute pan, pour oil in to a depth of 1 1/2 inches and heat until the oil reaches a temperature of 360 F.
Add one or two cutlets at a time turning as needed until golden brown on both sides. About 2 minutes or so. Drain briefly on paper towels.
In a separate pan, saute the the cabbage and carrots until lightly softened but still maintaining the crunch. Season to taste with salt and pepper.
To plate the dish, spoon sauteed veggies onto a serving platter. Next lay the pork cutlets over this. Finish with a drizzle of Tonkatsu Sauce over the meat. You can serve the remaining Tonkatsu Sauce in condiment cups for dipping.
1 to 1 1/2 coarse bread crumbs such as panko
1 to 1 1/2 lbs pork chops or pork steak, 1/2 inch thick\
1 egg
1 tbsp water
2 tbsp all purpose flour
2 cups finely shredded cabbage
1/2 shredded carrots
salad oil
salt and pepper to taste
Tonkatsu Sauce (See recipe below)
Tonkatsu Sauce: Stir together 1/2 cup ketchup and 2 tablespoon each of Worcestershire sauce and soy sauce.
Set aside your bread crumbs and Tonkatsu Sauce.
Trim and discard fat and bones from pork. Place meat between sheets of wax paper and pound with a mallet until the pork is a quarter inch thick.
Lightly beat egg with the water. Next spread the bread crumbs on a piece of wax paper or cookie sheet. Sprinkle each cutlet with salt and pepper to taste. Dust each piece of meat with flour, shaking off any excess. Dip cutlets into egg and press into crumbs to coat thickly all over. Set aside for 10 minutes.
Using a wok or a covered saute pan, pour oil in to a depth of 1 1/2 inches and heat until the oil reaches a temperature of 360 F.
Add one or two cutlets at a time turning as needed until golden brown on both sides. About 2 minutes or so. Drain briefly on paper towels.
In a separate pan, saute the the cabbage and carrots until lightly softened but still maintaining the crunch. Season to taste with salt and pepper.
To plate the dish, spoon sauteed veggies onto a serving platter. Next lay the pork cutlets over this. Finish with a drizzle of Tonkatsu Sauce over the meat. You can serve the remaining Tonkatsu Sauce in condiment cups for dipping.
Labels:
Cabbage,
Carrot,
cutlet,
egg,
Japanese,
Jesus,
Joseph,
ketchup,
mary,
Meal of The Month,
oil,
panko,
pepper,
Pork,
salt,
saute,
shred,
Tonkatsu Sauce,
worcestershire
Wednesday, June 27, 2012
"I Love You" In An Unconventional Way
After several months of intensive, visual therapy ("look left, look right...how many fingers am I holding up") Connie finally was authorized to remove her eye patch (which by this time was covered in enough rhinestones that it over shadowed the office disco ball). Two things happened! One, Wendell was entranced by duality of her vision and her two (count them) two gorgeous blue eyes. Two, depth perception having returned, Connie suddenly appreciated Wendell's manly good looks. Since then the rest of us in the CELEBRATE labs in Colchester, VT have noticed them beginning attempts to court each other. For example we have seen:
- Connie's handbag filled with cut-out paper hearts
- "Wendell, you wow me" written on the window in the morning dew
- We received a letter from the Burlington International Zoo thanking us for our adoption of a pair of love birds named "Connie and Wendell"
- Connie's dented fender when she was shocked by Wendell's recorded voice reciting love poetry over her car speakers. She told the police officer responding to the fender bender that she found a CD in her car stereo and confirmed Wendell was not in the back seat as she first thought. (She ran over our prized crab apple tree in the traffic circle in front of the lab)
- When invited over to Wendell's RV for cocktails, he served a delicious, fruity "Connie-Tini". A tsunami of nausea washed over the staff.
- Connie wrote "I'm wild about you" backwards on the rear window of his car. Glancing in his rear view mirror his pace maker worked overtime!
- Wendell screaming "Meana Tanda Wena" Zulu for "I Love You" (Picked up form his studying abroad in the Congo learning from the native people the finer points of pom-pom people dolls. Boy did his International Crafts degree pay off!)
Finally, after too many "Connie-Tinis" combined with the recent memory of her accident Connie decided to spend the night in Wendell's RV to be safe. As she laid her head on the pillow, "AHHHHHHHHHHHHHHHHHHHHHHHHHHHHHHHHHHHHHHHHHHHHHHHHHHH"! Wendell for yet another romantic surprise had placed a sturdy Hersey Kiss (point up) on Connie's pillow. Having poor vision in the dark, Connie's left eye caught the silver foil and her cornea was no match! Yes fans, the eye patch WILL return..... DON DON DOOOOOONNNNNNN.
We hope you were inspired by the prolific, romantic expressions of Connie and Wendell's blossoming love for one another!
To be continued....
![]() |
| Connie, an androgynous senior woman with eye patch |
Labels:
androgynous,
cocktail,
Congo,
Connie,
Crab Apple Tree,
dirty,
Eye Patch,
Hersey Kiss,
Jesus,
Joseph,
mary,
paper hearts,
RV,
Study Abroad,
Wendell,
Zulu
Thursday, June 14, 2012
::A New Look For An Old or Used Book::
Garage sale season is here and everywhere we go there are piles of old/used books and they are dirt cheap! Here are some clever ideas to re-purpose those books that won't make you sacrifice your favorite Kindle or Nook!
1.) Gift Box- Take an old book and hollow out the interior with an Xacto knife creating a niche. What you have just made is a gift box!
2.) DIY Magnetic Poetry/Sayings- Find a large print book. Stick your favorite pages on to self-stick magnetic sheets. Cut the words apart and you'll have the beginnings of all sorts of fridge lit!
3.) Bookends- Find some hardcover books that catch your eye. Depending on weight, glue together a minimum of 2-3 books together and let them dry for at least 48 hours. If you decide to pile the book with the spines horizontal, you are all set. If you plan on standing the spines vertically, make sure to glue the covers of the end books to the first page so they don't fan out.
4.) Tables- Glue a stack of good sized books together and pop a tray, framed mirror, wood, glass, marble, etc on the top. You will literally (ha-ha) have a pedestal table!
5.) Place Mats- Find large format, brightly colored colored children's books. Remove your favorite pages and laminate! Instant place mats that would be fun for your little ones!
6.) Accent Shelves- Measure the length of the spine of your book. Secure two "L" brackets to the wall at the height at which you would like your shelf. Make sure they are within the span of the spine. Place you book on top of the "L" brackets and you have a cute accent shelf for a small display!
1.) Gift Box- Take an old book and hollow out the interior with an Xacto knife creating a niche. What you have just made is a gift box!
2.) DIY Magnetic Poetry/Sayings- Find a large print book. Stick your favorite pages on to self-stick magnetic sheets. Cut the words apart and you'll have the beginnings of all sorts of fridge lit!
3.) Bookends- Find some hardcover books that catch your eye. Depending on weight, glue together a minimum of 2-3 books together and let them dry for at least 48 hours. If you decide to pile the book with the spines horizontal, you are all set. If you plan on standing the spines vertically, make sure to glue the covers of the end books to the first page so they don't fan out.
4.) Tables- Glue a stack of good sized books together and pop a tray, framed mirror, wood, glass, marble, etc on the top. You will literally (ha-ha) have a pedestal table!
5.) Place Mats- Find large format, brightly colored colored children's books. Remove your favorite pages and laminate! Instant place mats that would be fun for your little ones!
6.) Accent Shelves- Measure the length of the spine of your book. Secure two "L" brackets to the wall at the height at which you would like your shelf. Make sure they are within the span of the spine. Place you book on top of the "L" brackets and you have a cute accent shelf for a small display!
Wednesday, May 30, 2012
READER CHALLENGE ALERT!!!!
Hello Faithful Fans! We have a challenge for you. We're going to spend the time between now and our next post foraging and creating items with the things we find in the fields and forests around us. We challenge you to do the same! Go out into your environment natural or man-made (to you urban readers) and create fabulous things! Next email pictures to currenteventplanning@gmail.com and you might be lucky enough to have your creations featured!!! There may be prizes...maybe...
Good Luck! Michael, Kathleen, and the crew at CELEBRATE!
Labels:
challenge,
email,
Fans,
Forage,
Jesus,
Joseph,
Knotweed,
man-made,
mary,
organized religion,
prize
Not Just Your Mother's Clothespins Anymore!
Here are a few wonderful ideas for re-purposing those always handy clothespins!
1.) Use a spare clothespin to hold a nail to avoid hitting your fingers when hanging a picture frame.
2.) Attach a strip of self-adhesive magnet to one side of the clothespins. You can then attach nails or tacks to the magnet and then you can clip it to your shirt or other area close to your work space.
3.) Create a simple picture frame/holder by clipping a clothespin parallel to the bottom edge of the picture (long or short side depending on the picture's orientation)
4.) Attach a Popsicle stick to one side of the clothespin and create a bracelet "assistant". It'll make putting on a bracelet a one woman job! Hold the handle (Popsicle stick) in your hand with the clothespin facing down your forearm. Clip the clothespin to one end of your bracelet and wrap the other end around and secure. Tada!
5.) Use several clothespins to fold and secure the corners of your picnic tablecloth to protect it from gusts of wind.
6.) Keep several clothespins by your laundry hamper. When you soil something simply clip a clothespin on to mark it for stain treatment!
![]() |
| Clothespin Frock by Christopher Bailey for Burberry YIKES!!! |
Labels:
Clothespin,
Holy Spirit,
Jesus,
Joseph,
magnet,
mary,
nails,
pictures,
popsicle stick,
soil,
tablecloth
Thursday, January 26, 2012
"No More Smell? I Used an Onion! What The Hell?"
We have proof that onions can do more than make you cry ( and give you horrid breath)! Who would of guessed that this unlikely deodorizer would help refresh your dank basement? What is this magical item we speak of? An onion!!! To purify the air in your stuffy basement, cut an onion in half and place it on a plate. Next, place the plate in the basement overnight. Once the pungent odor dissipates, you will find your subterranean space will be void of foul scents!
![]() |
| Wendell, the newest member of our staff, seen here about to deodorize his basement! |
Subscribe to:
Posts (Atom)