Total Pageviews

Showing posts with label buttons. Show all posts

Sunday, July 13, 2014

Shedding Light on Lampshades!


Lets face it, lampshades are a necessity but they rarely get noticed!  You don't have to settle for how they look right off the shelf (i.e. plain Jane).  Why not have them be an enhancement than just a boring blank canvas next to the sofa!  Here is a list of a few ideas we have put together for you:


1) Bleach Pen: If you start with a colored lampshade, you can paint whimsical designs using an ordinary bleach pen found in the laundry isle of your favorite super market.  Work in small sections to avoid smudges. When the design turns white, rinse away the excess bleach.  Let it dry completely before use. 

2) Watercolors and Pin-pricking: If you start with a paper shade, you can use artist watercolors to paint simple and chic designs onto it.  Let your imagination guide you.  Once the artwork is dry, you can use a pin to perforate along the edge of some of the painted elements so the light can twinkle through.


3) Ombre: Start with a fabric shade. Mix a package of fabric dye according to directions.  Submerge the entire shade in container deep enough to accommodate it.  Set a timer for 10 minutes. Once your timer goes off, remove the shade and place it on an old towel or piece of wax paper.  Poor off 1/3 of the dye and return the shade to the color bath.  Set your timer again for 10 minutes.  Once again, when the timer goes off remove the shade and pour off another 1/3 of the dye.  Replace the shade and leave it in for a final 10 minutes. When finished, remove the shade and allow to completely dry before using it.  


4) Spray Adhesive:  Using spray adhesive, you can add comic book pages, maps, pages from your favorite novels, pieces of fabric, etc. The sky's the limit! Be creative as you personalize your lamp.
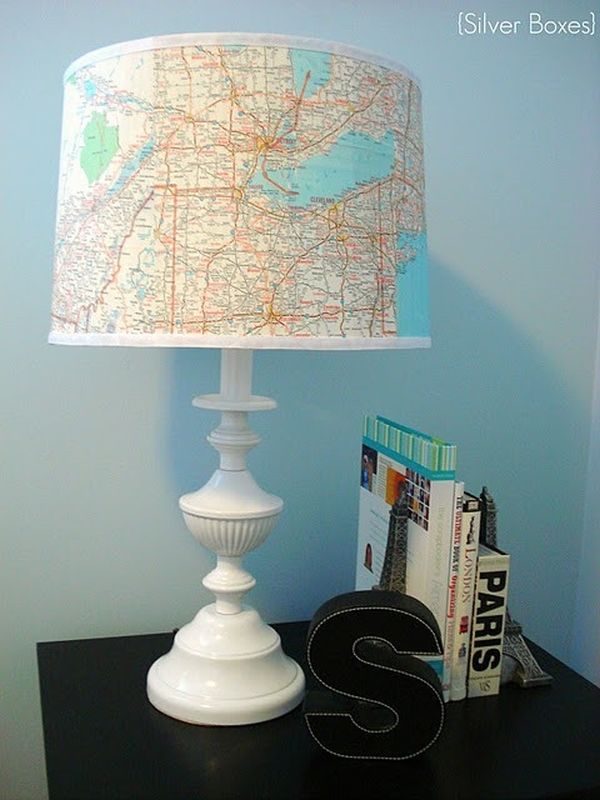
                                               

5) Ribbons and Rosettes:  Using your trusty glue gun, you can embellish your lampshade with a row of sweet satin rosettes around the bottom.  You can buy them at your favorite craft store.  If you want a cleaner, more modern look try adding metallic strips or black patent leather trim to the top and bottom edges of the shade.

6) Paint Markers:  Use opaque paint markers to draw geometric pattern or lines. Use your lightest color first, let dry and then use a darker color for outlining.  You could also use these markers to write your favorite quotes, belief statements, poems, wishes, etc on the shade for a literary punch!
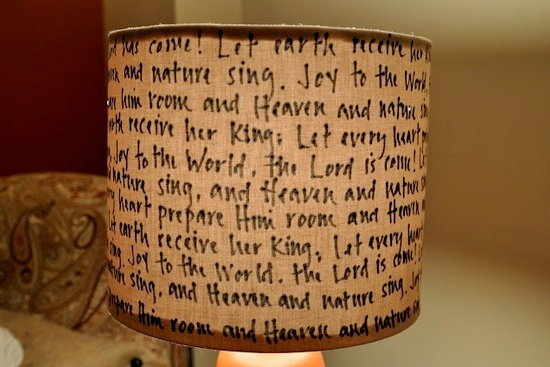
                                        

7) Buttons:  Use hot glue to adhere a variety of buttons or plastic, magnetic alphabet letters (the brightly colored ones kids play with on the fridge) to your shade for a fun pop of color!

8) Satin Ribbon for your boudoir:  Take wide satin ribbon in a color of your choice, anchor a piece inside using hot glue, and wrap your shape vertically.  If your shade is conical, be mindful to overlap the top layers of ribbon as you wrap.  Secure the end of the ribbon again using a dab of hot glue.


Wednesday, March 26, 2014

What a great idea! Innovative Organization Ideas

This afternoon, we were organizing the Vanna White Fiber Crafts Room at our Colchester headquarters and the ideas just began to flow like sap in the spring time (a little Vermont humor)!
  1. We were organizing our extensive thread inventory into drawer units and realized we could only see the tops of each spoil.  How can we tell them all apart?  We raced to our antique jam jar filled with magic markers and began color coding.  We colored all the blues blue, yellows yellow, etc.  Now we can quickly spot color groups and locate the exact color we are looking for quicker!
  2. Marking the thread inspired us to take a look at our craft paints which were also stored in drawers.  Similar to the thread, we had to pull out several bottles before finding the right color.  Our solution? We painted the top of each bottle cap with a dab from it's contents.  Now we can easily locate that bottle of Moss green! 
  3. After organizing our thread and craft paints, we became tired and needed a caffeine boost.  We went to the staff kitchen to grab a cup of coffee to go and couldn't seem to find the coordinating top for the travel mugs.  How do we solve this dilemma? Nail polish!  Once you have paired each set together, color code each set with a dab of nail polish...red dot bottom, red dot top, pink dot bottom, pink dot top and so on.  
  4. We took our coffee back to the craft room to continue our organizing quest.  We found a bunch of embroidery floss.  Most of it was partially used and getting tangled.  Our solution?  A photo album with pages that have multiple pockets.  We separated the colors and slipped them into each pocket.  This now allows us to flip through and locate the perfect floss quickly.
  5. We have ALOT of button, don't ask, don't judge.  We had been keeping them in a wholesale pickle jar.  We ever we needed a button, we would task Timmy, our intern to search for it.  He would have to dump out the entire jar and it took a lot of overtime.  Our solution? Small matching buttons are now threaded onto large safety pins.  Others are sorted by color and placed in zip-lock style bags and stored in plastic shoe boxes.  Now Timmy can find the buttons in a flash!
  6. We had several full and partial skeins of yarn.  They had all been tossed in a large plastic bag.  Again the whole bag would need to be dumped out and untangled to find that perfect shade of fushia.  Our solution?  Sturdy file boxes which stack nicely and are not heavy when filled with yarn.  We snipped a piece from each skein and taped them to the top of the box.  Each skein was then placed in a zip-lock bag to keep them from tangling or picking up fowl odors from the lab.  Now when we need four yards of chartreuse yarn all we have to do is check the box top to see which holds which color.
  7. After all this organizing, we were exhausted but we couldn't figure out what sizes all the different sheets in the lab's dormitory closet were.  Our solution?  Label with a fabric marker and fabric paints.  T for twin, F for full, and so on.  We marked the sheets in an area that would be tucked in and hidden from sight.  

Sunday, July 28, 2013

Random Tip Round Up!!!

1.) Stop Loose Buttons in Their Tracks:  Avoid losing a button on your favorite button up shirts by coating the center of the buttons with a drop of clear nail polish.  Once it dries it will prevent the threads from fraying over time.  You can also tip unraveling ends of shoelaces in clear nail polish to seal them.

2.) Personalized Mugs In a Flash:  Adding a personal touch to your coffee cup has never been easier!  All you need is a plain, white, ceramic mug and a Sharpie marker.  Simply add your personalized message or design to the mugs exterior with the marker and bake in the oven at 350 degrees for 30 minutes!  Remember to hand wash the mug once personalized!  If you forget, no worries!  The worse that can happen is the design fades over time and you will simply need to touch it up and re-bake it!  The ideas are limitless!  Use a large array of colored Sharpie markers to make colorful designs.  These personalized mugs can make a great gift for friends and family!  They would make a stellar house warming present too!  Don't forget teachers too!

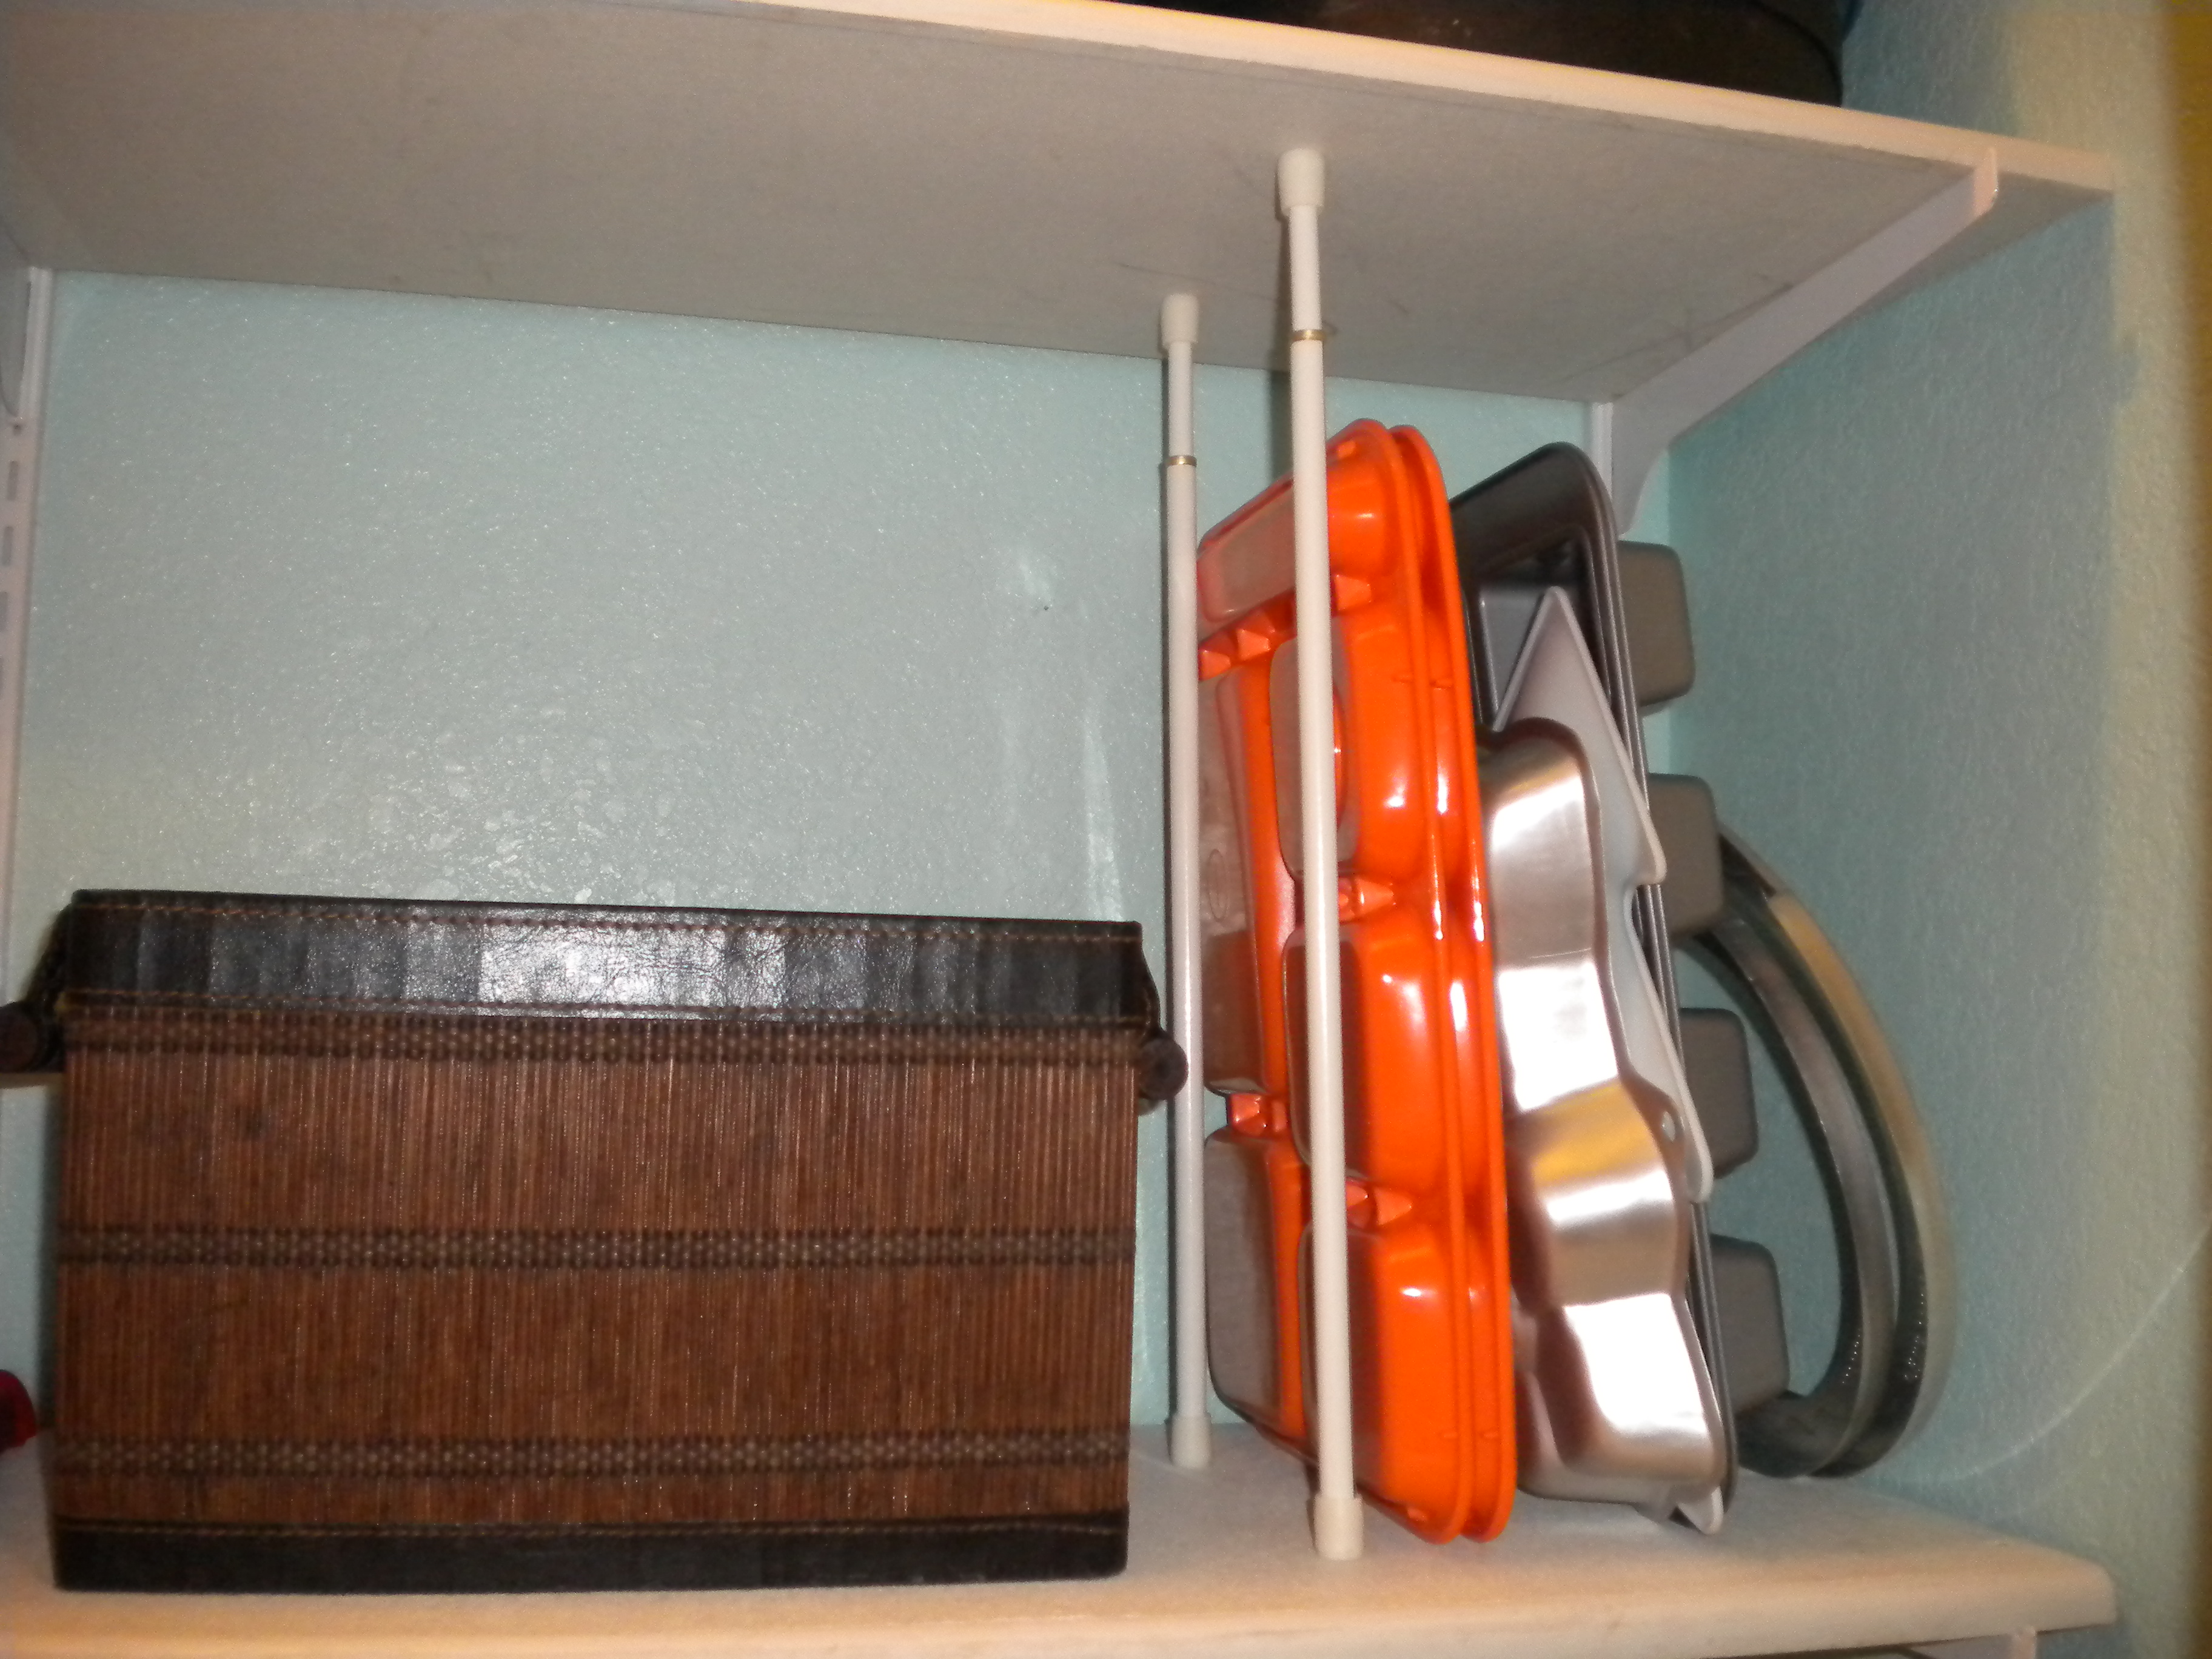
3.) Organize Your Kitchen Shelves In A Jiff:  Use a pair of short, spring loaded, adjustable tension rods to divide your shelves helping to coral all your platters, baking sheets, and cutting board vertically!  Remember, you'll need at least a pair for each division.


4.) Never Let Your House Plants Dry Out:  Breathe new life into old glass bottles by re-purposing them as watering globes!  Fill the bottles with water, invert them quickly, and stick them into the soil of your potted plants, hanging baskets, and container gardens.  Science and gravity will do the rest.  Refill as necessary.

5.) Clean Cut...Brownies:  To get a clean, crisp edge when cutting your next batch of brownies try using a disposable plastic knife while the brownies are still warm.  They will cut like butter!

6.) Don't Get Caught In A Sticky Situation:  Next time you find yourself with gum stuck on your clothing try this trick.  First remove the piece of clothing and place it in a sink or basin.  Boil some vinegar and pour it over the effected area while it is still hot.  Scrub vigorously and the gum should come off almost instantly! Use caution and common sense, don't burn yourself.